冯乐乐入门精要笔记
光照
基础光照
漫反射光照模型(兰伯特模型)
1. 逐顶点漫反射光照
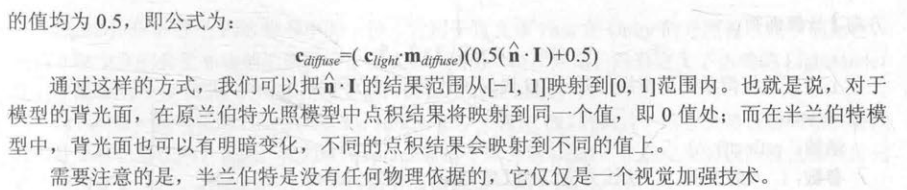
在背光面和向光面交界有一些锯齿,背光面明暗一样。
1 | Shader "Unlit/myDiffusePixelLevelMat" |
2. 逐像素漫反射光照
可以得到更加平滑的光照效果,背光面明暗一样。
1 | Shader "Unlit/myDiffusePixelLevelMat" |
3. 半兰伯特模型(Half Lambert)

背光面明暗有变化

1 | 修改逐像素漫反射光照的一行代码即可: |
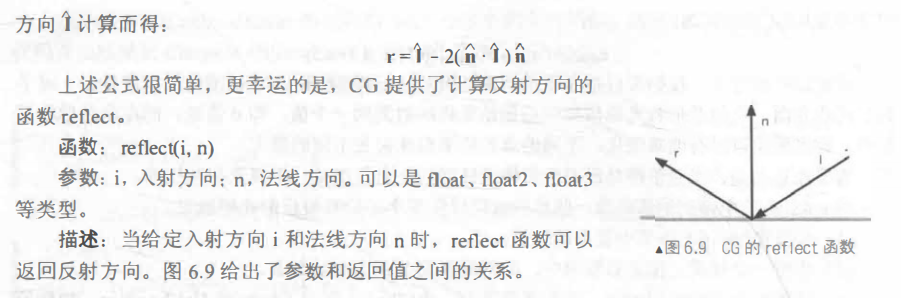
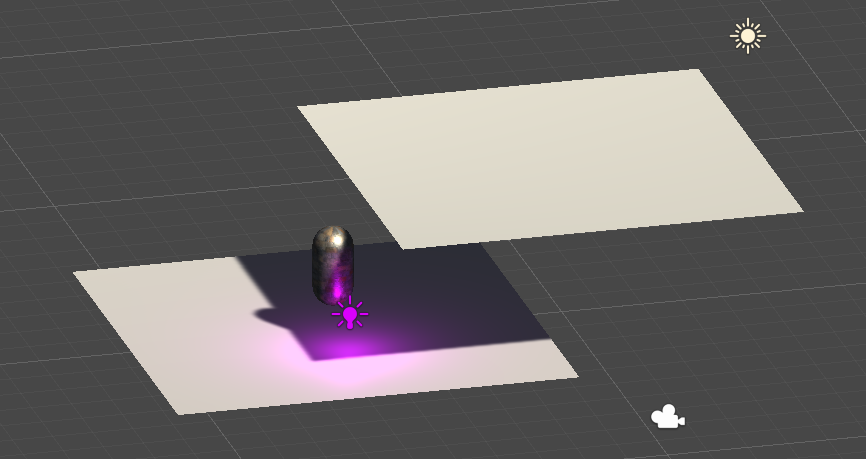
高光反射光照模型
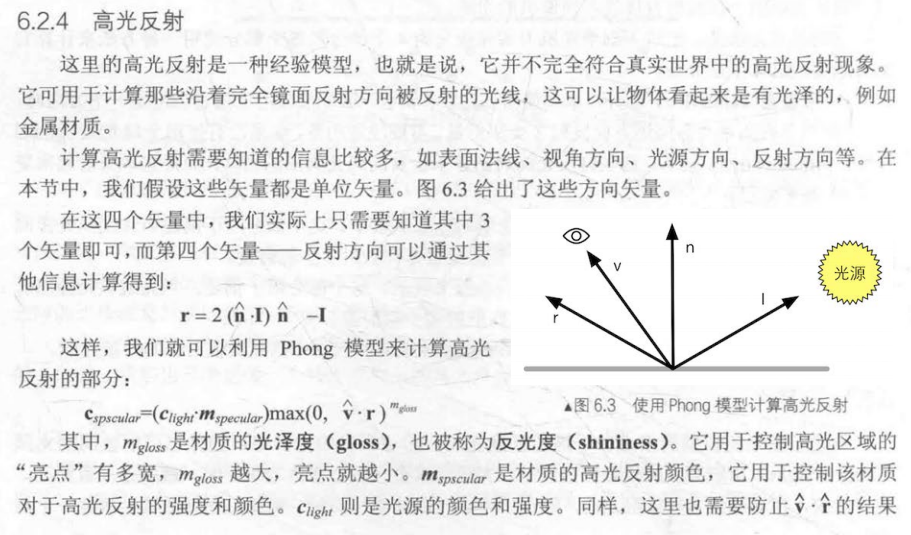
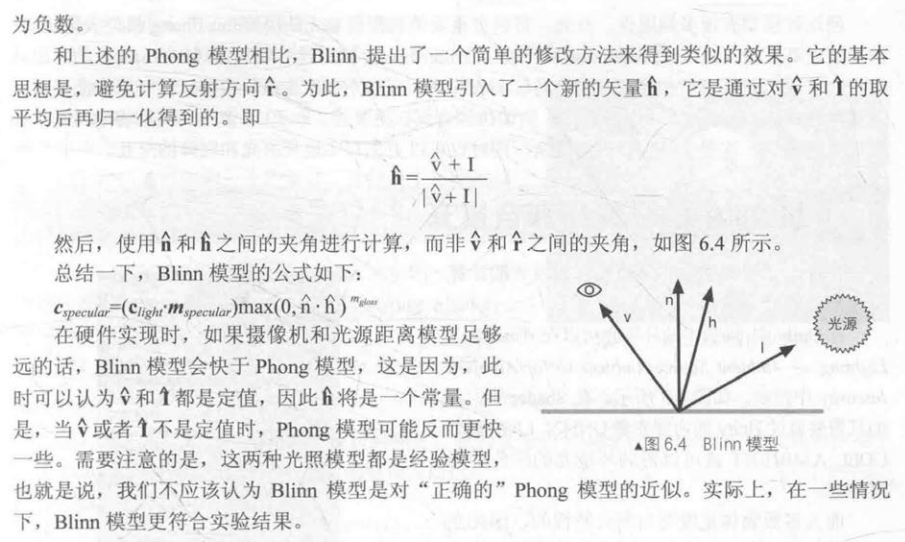
reflect()函数计算反射方向:

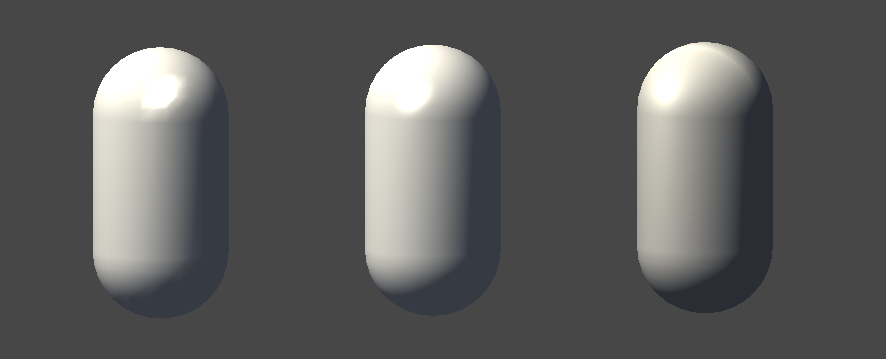
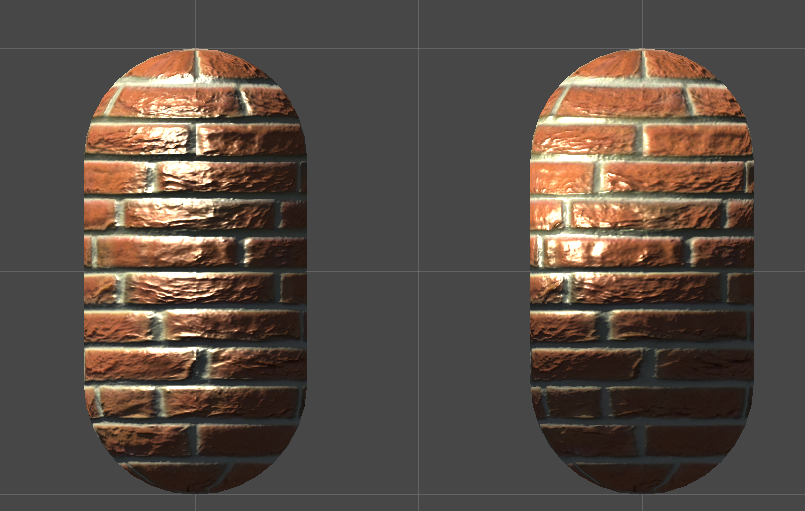
逐顶点光照:高光部分不平滑
逐像素光照:高光部分平滑
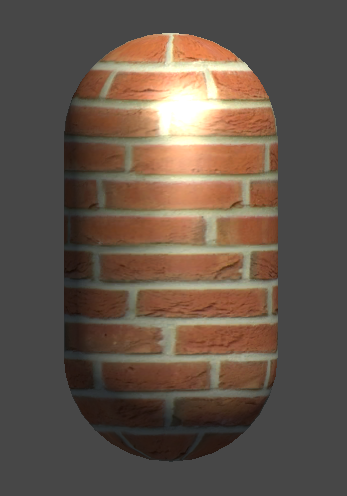
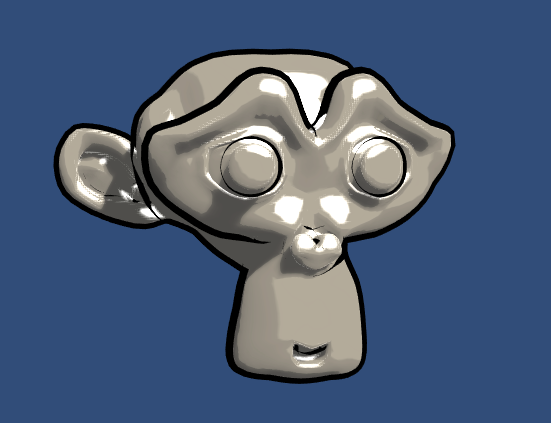
BlinnPhong光照:高光反射部分更大更亮,在实际渲染中常采用此模型。
1. 逐顶点光照
1 | Shader "Unlit/MySpecularVertexLevelMat" |
2. 逐像素光照
1 | Shader "Unlit/MySpecularPixelLevelMat" |
3. BlinnPhong模型
1 | Shader "Unlit/NewUnlitShader" |
复杂光照
1. unity渲染路径
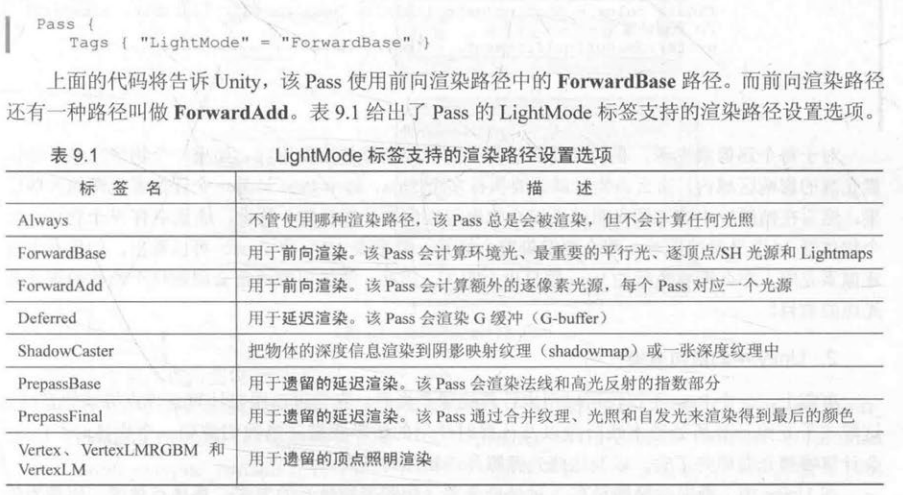
常用前向渲染路径
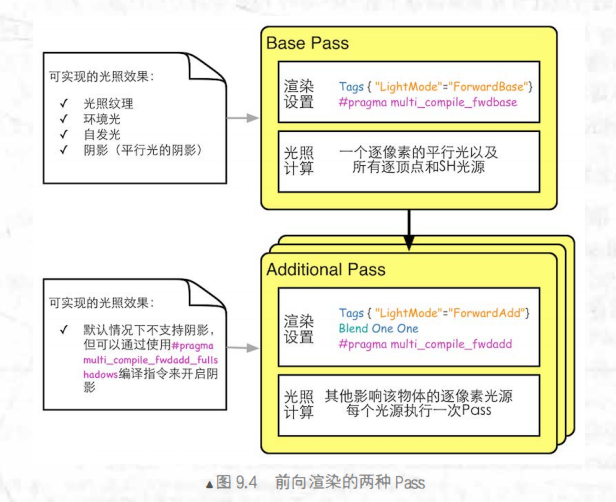
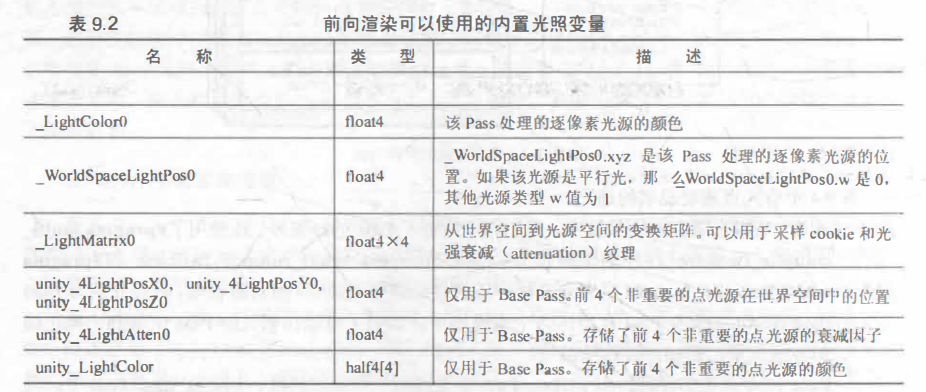
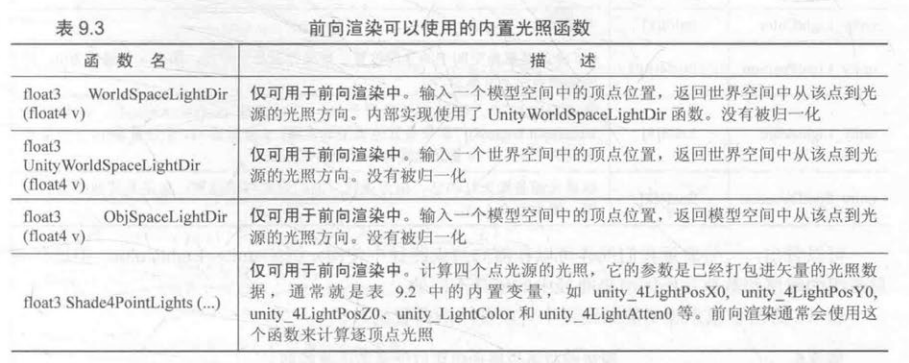
2. 前向渲染处理不同光照类型

1 | Shader "Unlit/MyForwardRenderingMat" |
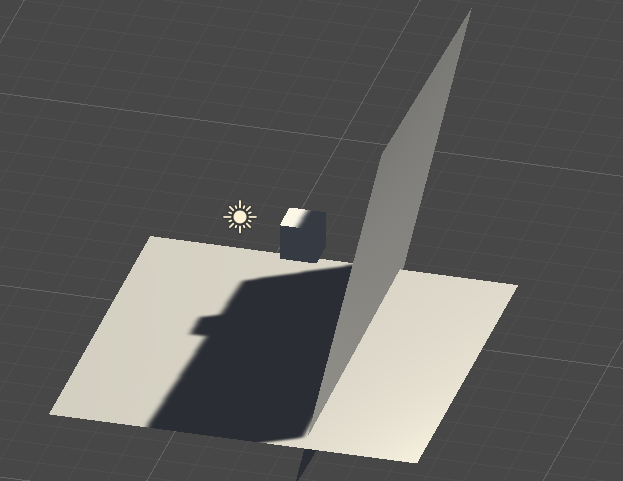
3. 阴影
1 | Shader "Unlit/MyShadowMat" |
4. 标准光照着色器
1 | Shader "Unlit/MyShadowMat" |
纹理
基础纹理
1. 单张纹理
1 | Shader "Unlit/MySingleTextureMat" |
2. 凹凸映射
凹凸映射有两种方法:高度映射和法线映射,本章讨论的都是法线映射。
切线空间计算
1 | //在切线空间计算光照模型 |
世界空间下计算
1 | //在世界空间计算光照模型 |
3. 渐变纹理
使用渐变纹理可以控制物体的漫反射光照
1 | Shader "Unlit/MyRampTextureMat" |
4. 遮罩纹理
控制模型表面的各种性质
1 | Shader "Unlit/MyMaskTextureMat" |
高级纹理
【脚本】创建用于环境映射的立方体纹理
P212:我们希望根据物体在场景位置的不同,生成他们各自不同的立方体纹理。该代码需要添加菜单栏条目,因此我们需要把它放在Editor文件夹下才能正确执行。
1 | using UnityEngine; |
立方体纹理
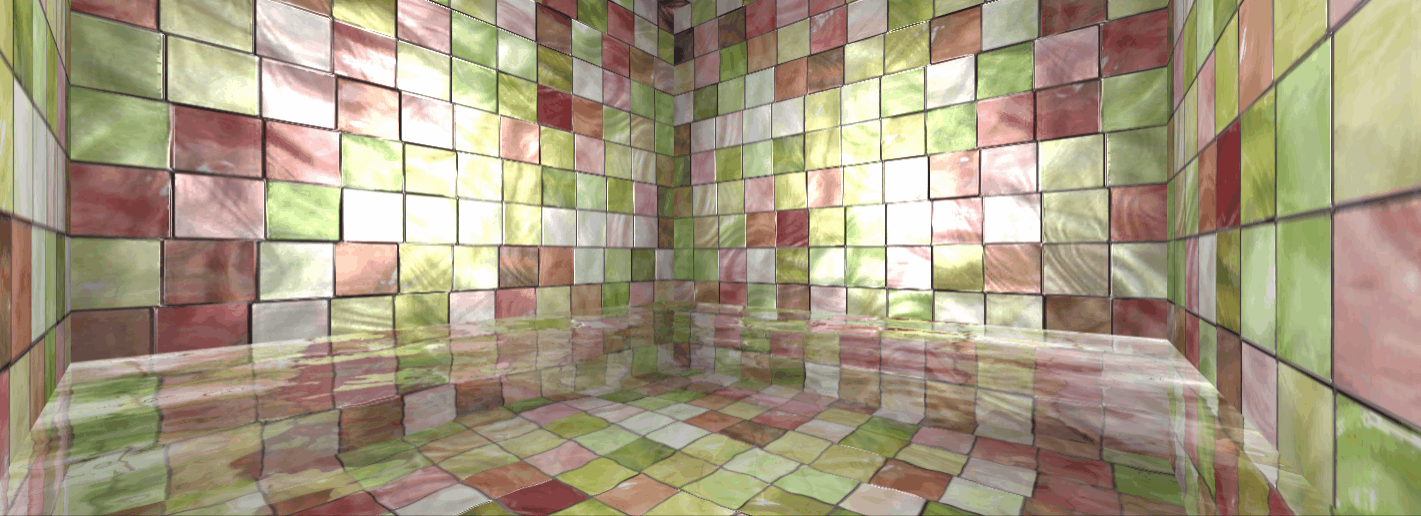
1. 反射
通过入射光线的方向和法线方向来计算反射方向(使用reflect函数),再利用反射方向对立方体纹理采样。
1 | Shader "Unlit/MyReflection" |
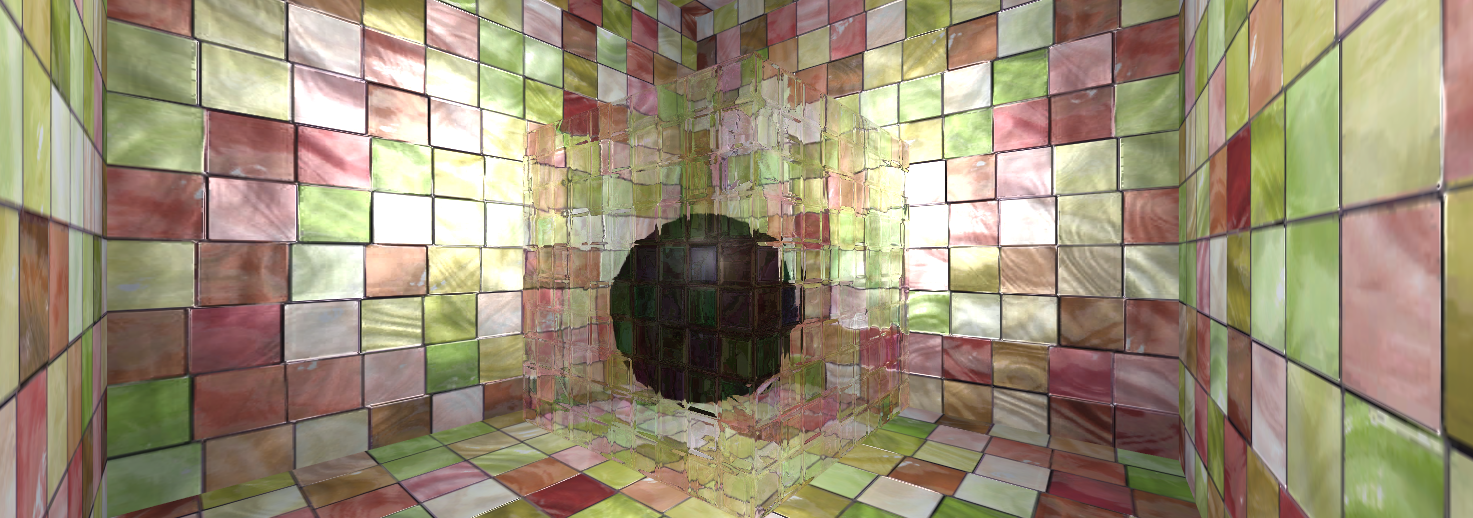
2. 折射

1 | Shader "Unlit/MyRefraction" |
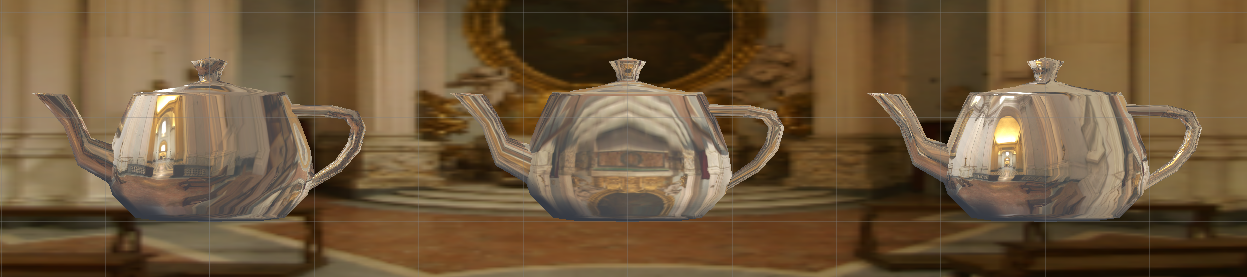
3.菲涅尔反射
使用Schlick菲涅尔近似等式计算
1 | Shader "Unlit/MyFresnelMat" |
渲染纹理
1. 额外摄像机抓取屏幕图像实现镜子效果
1 | Shader "Unlit/MyMirrorMat" |
2. GrabPass抓取屏幕图像实现玻璃效果
1 | Shader "Unlit/MyGlassRefractionMat" |
程序纹理
【脚本】简单程序纹理
1 | using System; |
噪声
消融效果
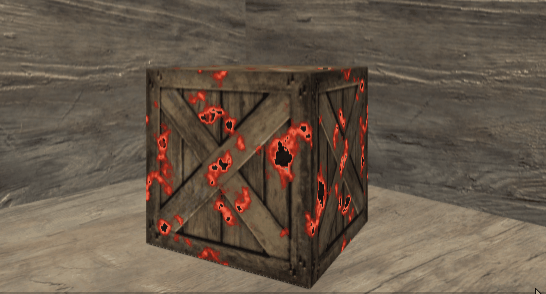
1 | Shader "Unlit/MyDissolveMat" |
水波效果

1 | Shader "Unlit/MyWaterWaveMat" |
不均匀雾效
1 | using System.Collections; |
1 | Shader "Unlit/MyFogWithNoise" |
透明效果
实现透明效果的两种方法:透明度测试和透明度混合
透明度测试

透明度测试的显示效果比较极端:要么完全透明(看不到),要么完全不透明。而且,透明效果的边缘有锯齿。

1 | Shader "Unlit/MyAlphaTest" |
透明度混合
1. 一般方法

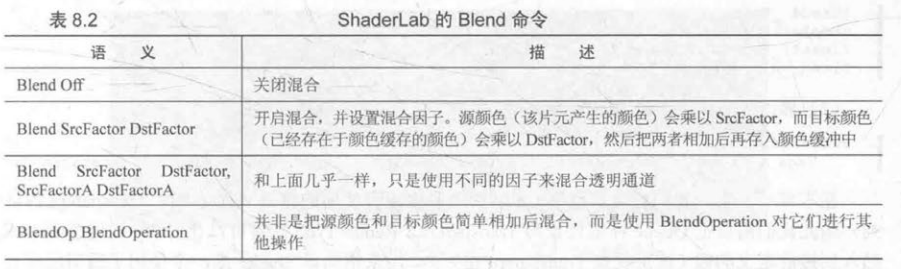
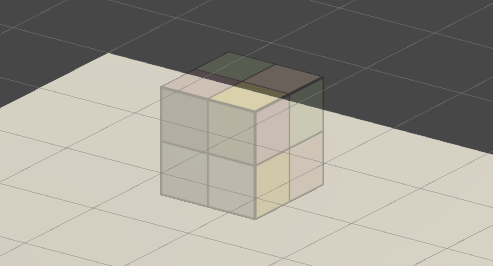
透明度混合可以得到更加柔和的透明效果,但是这种方法仍有弊端:关闭深度写入后,造成错误排序,无法对模型进行像素级别的深度排序。
实现效果:

1 | Shader "Unlit/MyAlphaBlendMat" |
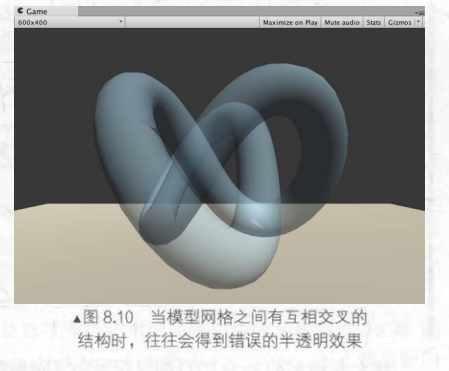
2. 开启深度写入的半透明效果
使用两个Pass来渲染模型,使用这种方法我们仍可以实现模型与他后面的背景混合的效果,同时模型内部之间不会有任何的半透明效果。
1 | Shader "Unlit/MyAlphaBlendZwriteMat" |
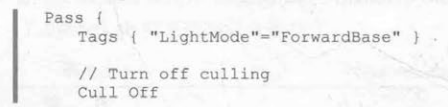
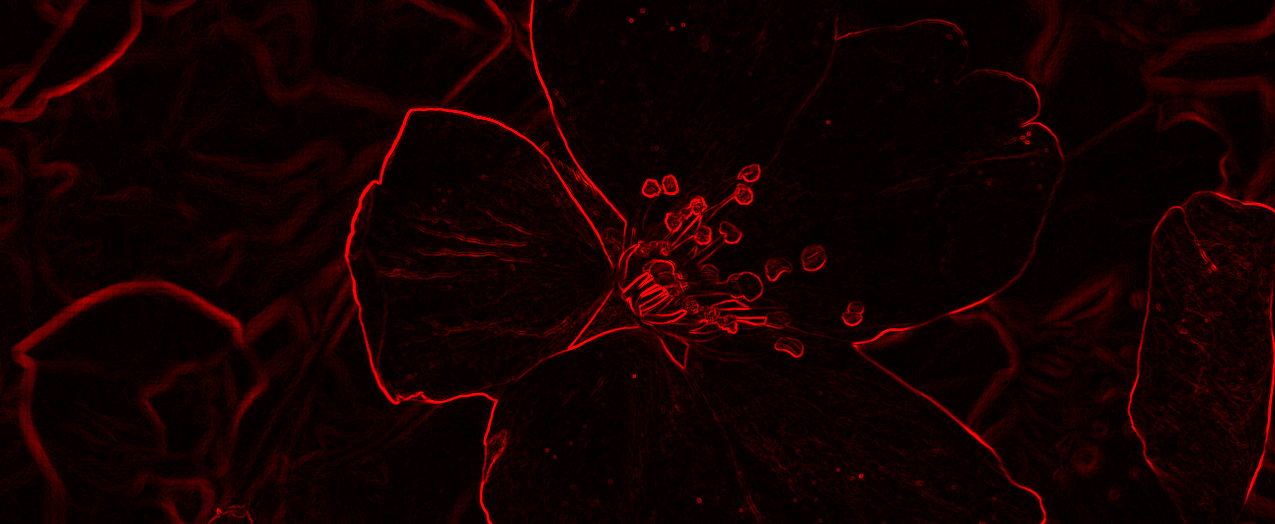
双面渲染
通过双面渲染可以看到物体内部和背部的结构。
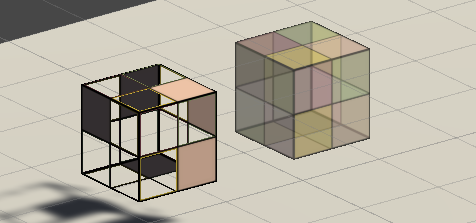
1. 透明度测试的双面渲染
2. 透明度混合的双面渲染


动画
纹理动画
1. 序列帧动画

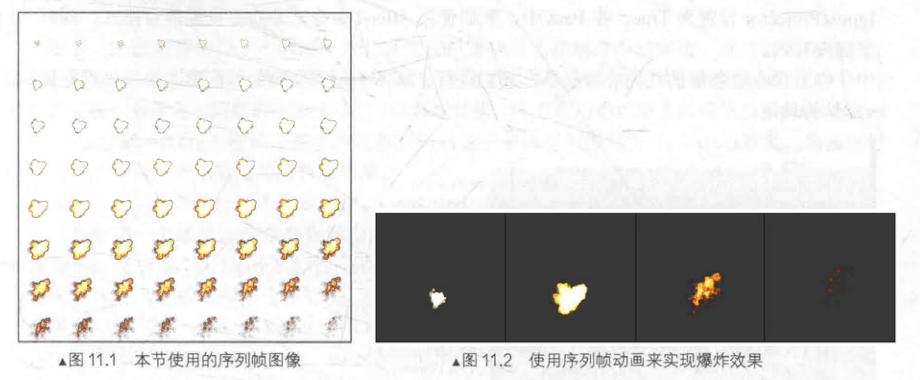
1 | Shader "Unlit/MyImageSequenceAnimationMat" |
2. 滚动卷轴动画
1 | Shader "Unlit/MyScrollingBackgroundMat" |
顶点动画
1. 河流

1 | Shader "Unlit/MyWaterMat" |
2. 广告牌
使多边形看起来总是面对着摄像机,应用:渲染烟雾,云朵,闪光效果等

1 | Shader "Unlit/MyBillboardMat" |
3. 顶点动画添加阴影

1 | Shader "Unlit/MyVertexAnimationWithShadowMat" |
屏幕后处理效果
【脚本】父类
1 | //用于屏幕后处理效果的基类 |
调整屏幕亮度,饱和度和对比度

1 | //调整屏幕亮度,饱和度和对比度 |
1 | Shader "Unlit/MyBrightnessSaturationAndContrast" |
边缘检测
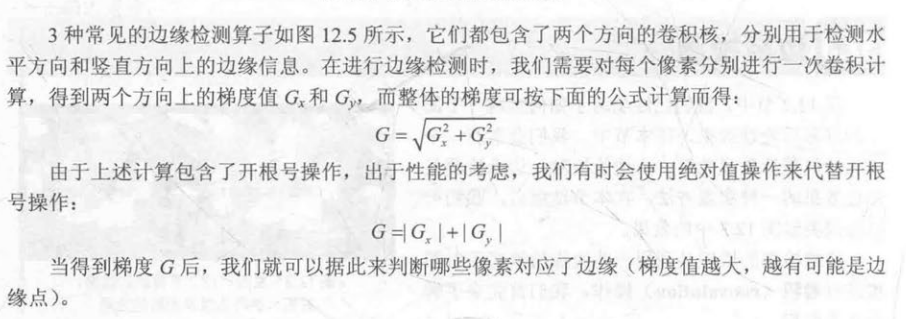
1. 颜色纹理(Soble算子)
1 | using System.Collections; |
1 | Shader "Unlit/MyEdgeDetection" |
2. 深度+法线纹理(Robert算子)


1 | using System.Collections; |
1 | Shader "Unlit/MyEdgeDetectNormalAndDepth" |
高斯模糊
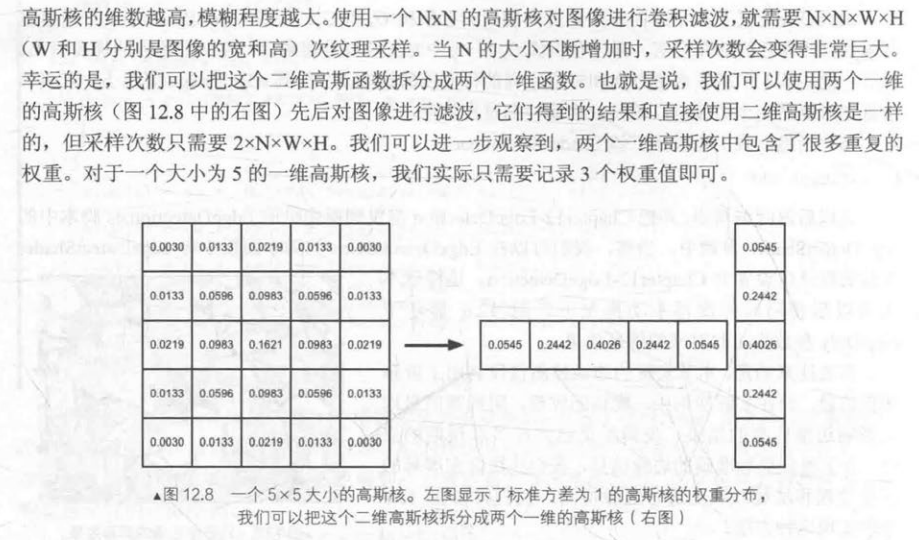
1 | using System.Collections; |
1 | Shader "Unlit/MyGaussianBlur" |
Bloom效果


1 | using System.Collections; |
1 | Shader "Unlit/MyBloom" |
运动模糊
1. 累积缓存(颜色纹理)
保存之前的渲染结果,不断把当前的渲染图像叠加到之前的渲染图象中,从而产生一种运动轨迹的视觉效果。
1 | using System; |
1 | Shader "Unlit/MyMotionBlur" |
2. 速度缓存(深度纹理)
1 | using System.Collections; |
1 | Shader "Unlit/MyMotionBlurWithDepthTexture" |
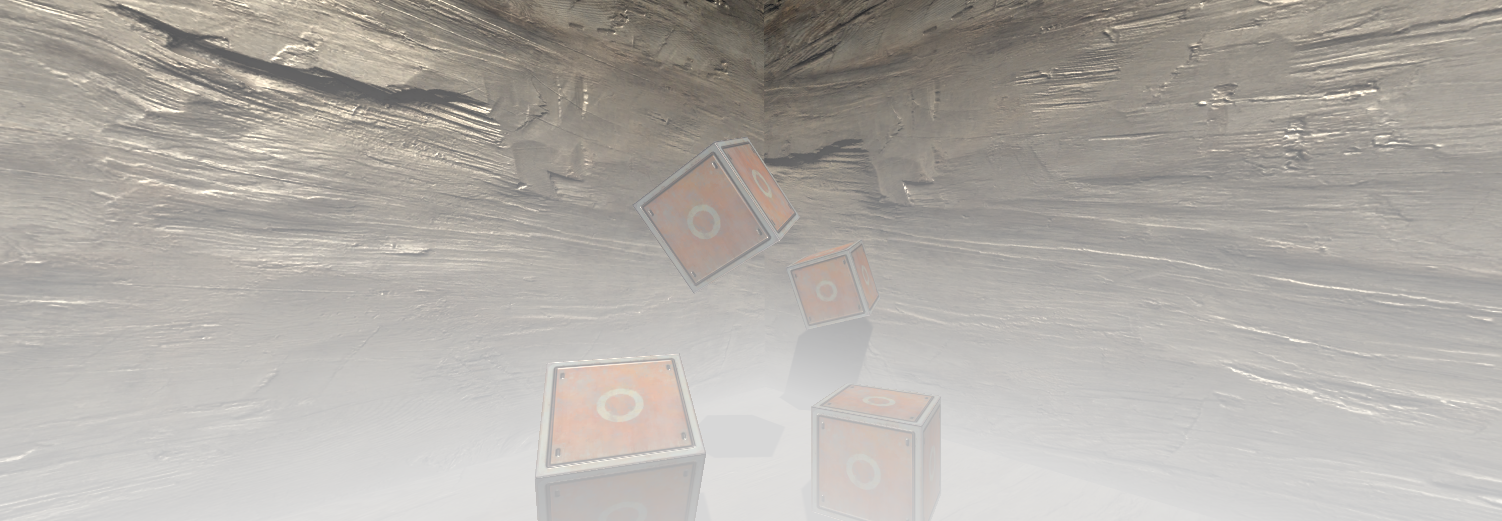
全局雾效
基于高度的雾效
在同一高度上,雾的浓度是相同的

1 | using System.Collections; |
1 | //基于高度的雾效模拟 |
非真实感渲染(NPR)
卡通风格渲染
1 | Shader "Unlit/MyToonShadingMat" |
素描风格渲染
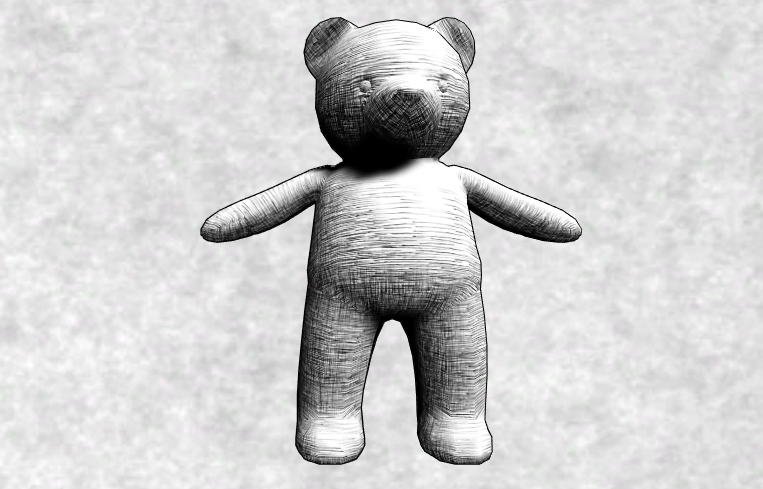
1 | Shader "Unlit/MyHatchingMat" |
本博客所有文章除特别声明外,均采用 CC BY-NC-SA 4.0 许可协议。转载请注明来自 游戏江湖!
 微信
微信 支付宝
支付宝
评论
WalineLivere